In this step-by-step guide, you will be able to find out and learn all the essential information when it comes to creating and administrating study trips using Studiz.
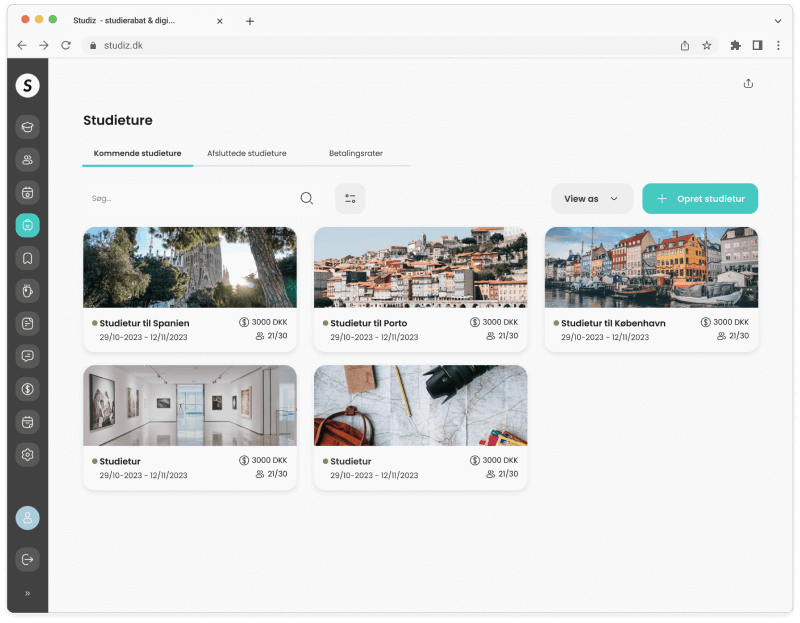
1. Study trip page
On the study trip page, you can see all the information regarding study trips by switching the tabs:
1. Upcoming study trips
2. Past study trips
3. Instalments
2. Creating a new study trip
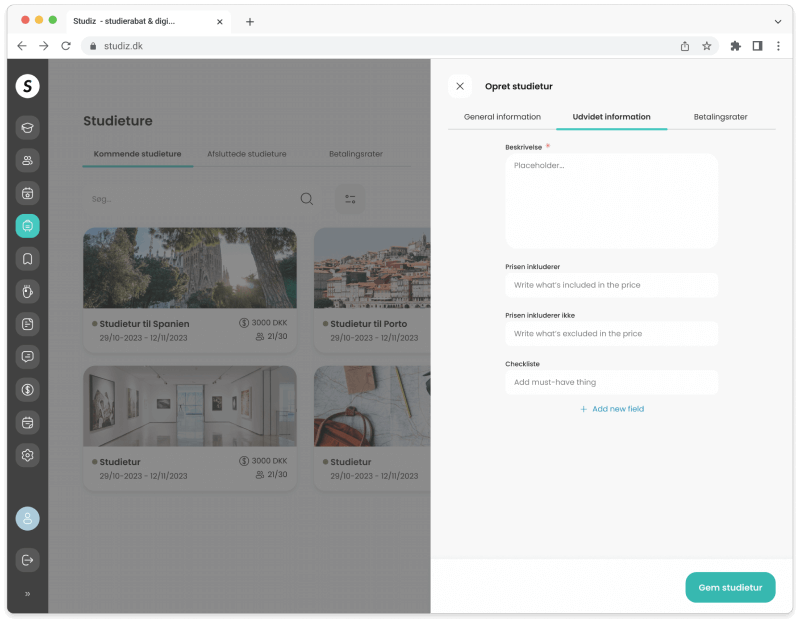
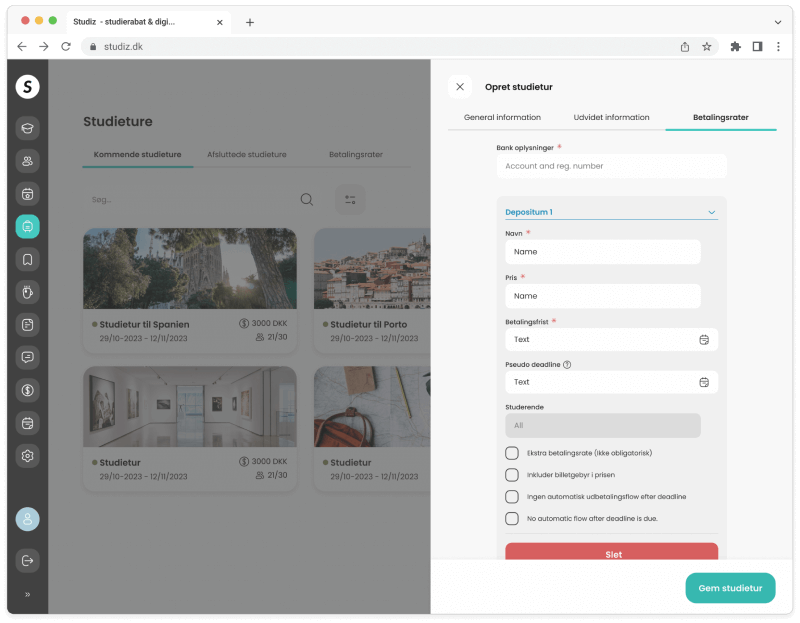
Click the button “Create study trip” to open the side panel and fill in the form:
1. Fill in the general information like:
• Name of the trip
• Add a cover picture
• Start and end dates
• Max number of participants (if there are limited seats)
• Employees who are responsible for the trip and should have access to view and correct information
• Classes and electives if the trip is only to be available for specific students

2. Fill in the optional detailed information like:
• Description of the trip
• Price includes/excludes
• Checklist
• Pocket money requirements
3. Add information about bank and installments:
• Name of the installment
• Price
• Deadline period
• If necessary, specify students to pay the installment/specify the installment as optional, etc.
3. See detailed overview of specific study trip
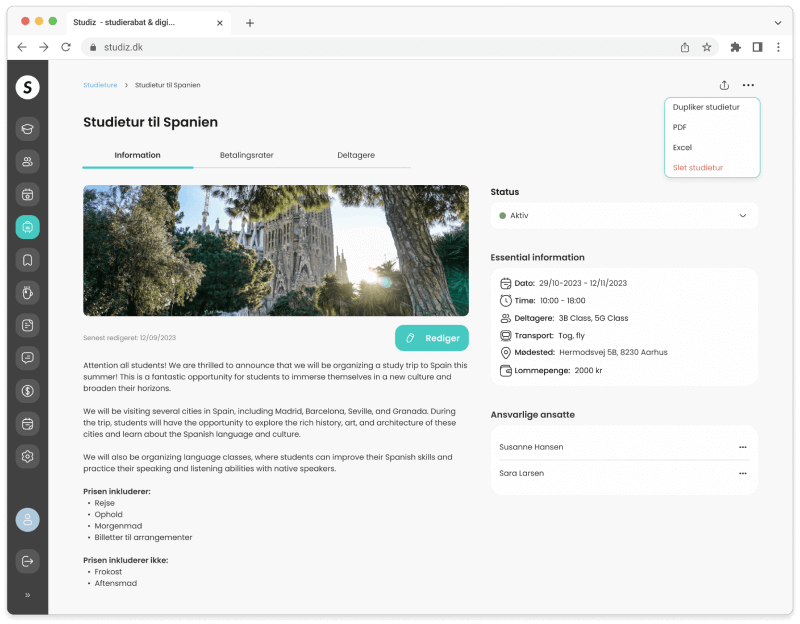
When you click on the study trip, you will be navigated to its’ detailed page.
On the information tab you can:
• Read more the study trip and edit its’ information
• Duplicate the study trip
• Export as PDF/Excel
• Change the status of the study trip - when it’s active, every student who is eligible to participate can see the trip
• Delete study trip
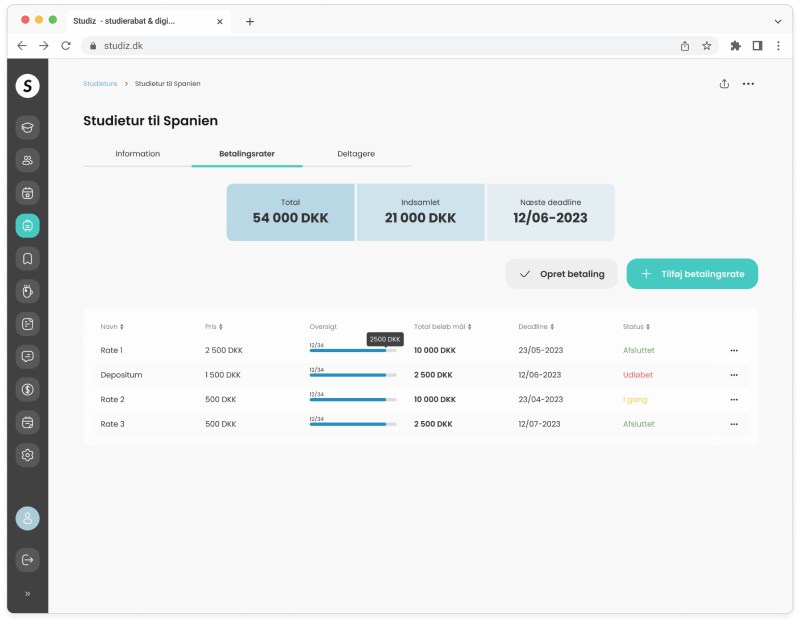
On the installment tab you can:
• See the installment information, deadlines and payment progress statistics
• Register a payment (if it hasn’t been made through the system)
• Quickly add new installment or edit an existing one
• Cancel payment
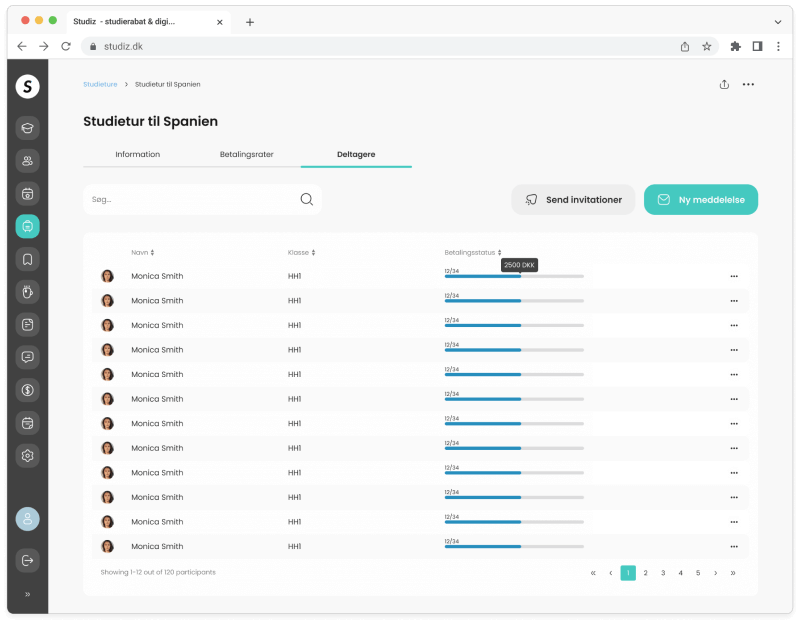
On the participant tab you can:
• See an overview of all students who signed up for the trip and their payment progress
• Send invitations or write messages to all participants
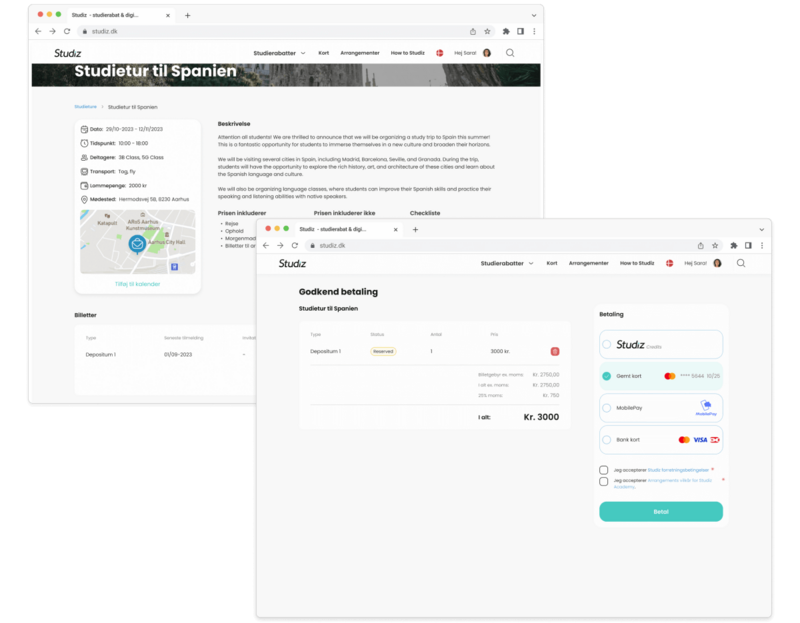
4. What can students see?
When a trip is active, students that have a verified Studiz profile and are specified to see the trip, can view it via their student profile on the study trip side at studiz.dk. In addition, link to the trip can be found in the invitation e-mail.
• Students can see and read all the information regarding the study trip.
• Student can purchase the study trip ticket by adding it to the basket and selecting a payment method
• Students can also send the payment link, e.g. allowing a family member to pay for it