In this step-by-step guide, you will be able to find out and learn all the essential information when it comes to creating and administrating events using Studiz.
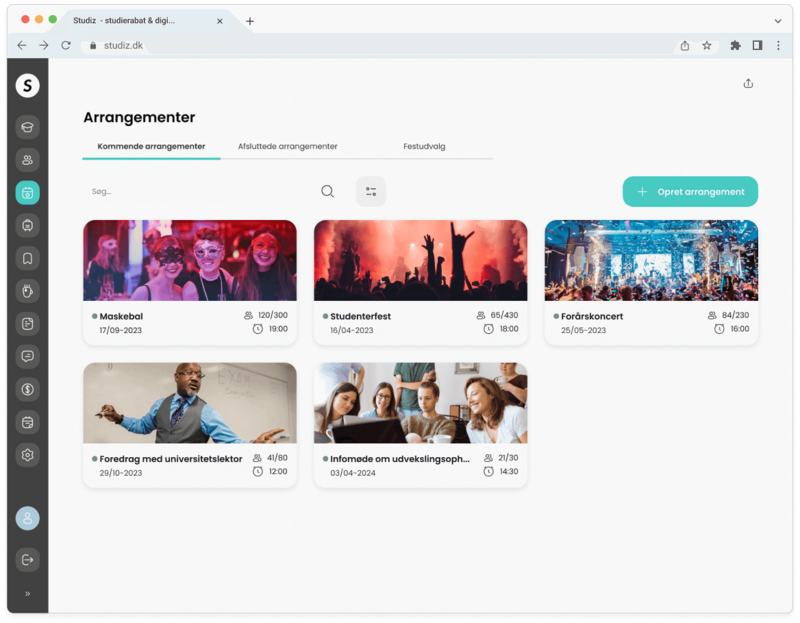
1. Events page
On the events page, you can see all the information regarding events by switching the tabs:
1. Upcoming events
2. Past events
3. Party committees
2. Creating a new event
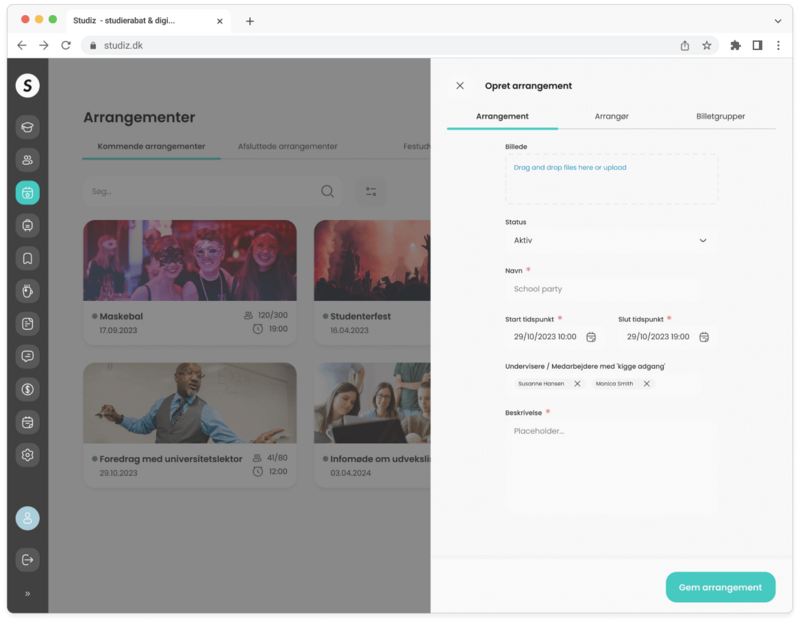
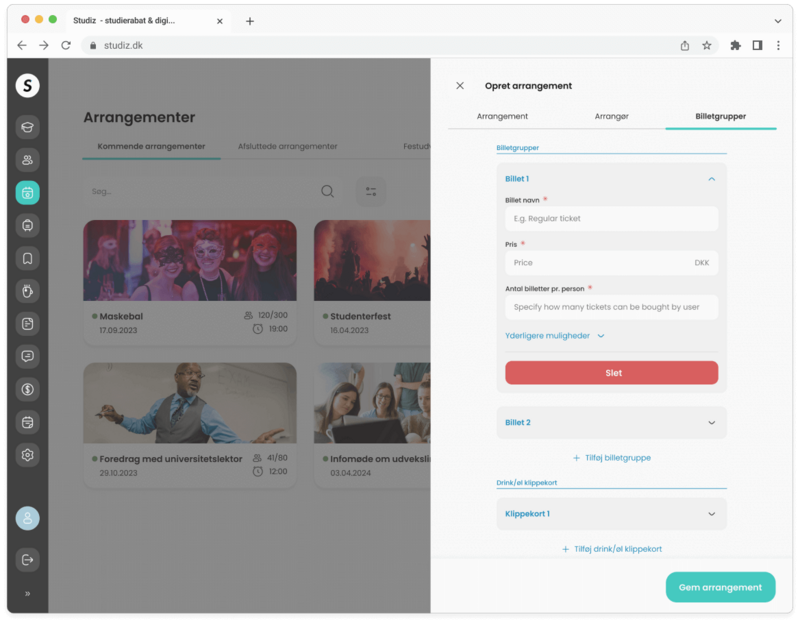
Click the button “Create event” to open the side panel and fill in the form:
1. On the first tab, fill in the general information like:
• Name of event
• Add a cover picture
• Start and end dates
• Description of the event
• Employees who are responsible for the event and should have access to view and correct information
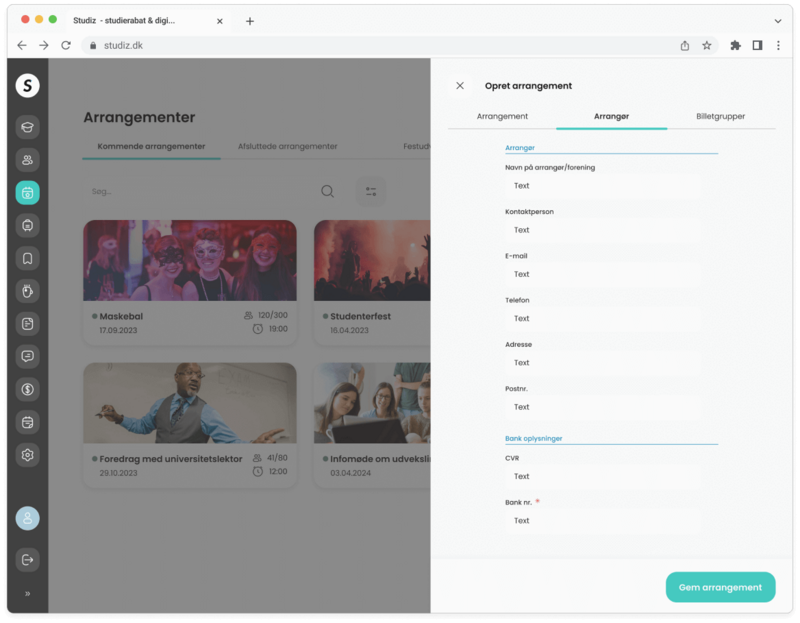
2. On the second tab, fill in the organizer information like:
• Name of the organizer
• Contact information of the organizer
• Bank information
3. On the third tab, add ticket groups and drink coupons information:
• Name of the ticket
• Price
• Max. number of tickets per person
• If necessary, select additional options to customize your ticket groups for different needs (see next step for more information)
3. Additional ticket options’ explanation
You can add as many ticket groups as you wish. As a starting point is a ticket group is only available for institutions’ verified students. However, you can customize the ticket availability using our “Additional options” functionality:
• Specify bank information: State the account where the ticket purchase will deposit
• Add invitations: Allow guests to invite friends
• Ticket group for former students: Allow ticket purchase for students who have previously attended institution
• Ticket group for not students: Allow ticket purchase for people who are not students (e.g. parents)
• Specify ticket sale stop: When should the sale of tickets expire. (if this is not filled, students can purchase tickets until the event is completed)
• Specify students for ticket group: Only individual classes/electives will have access to the tickets
• Number of available tickets: Max. amount of tickets that can be sold
• Allow pre-scan: If there is a need to scan the tickets earlier than 30 min. before the event starts
• Specify students for ticket group: Only individual classes/electives will have access to the tickets
• VIP-ticket group: Specify if the ticket is VIP
• Employee ticket group: Only employees will have access to purchase the tickets
• Extra input: Add your own terms for ticket purchase
• Allow multiple purchases: Specify how many times can one person buy the ticket
• Minimum age: Set age restriction for buying the ticket
4. See detailed overview of a specific event
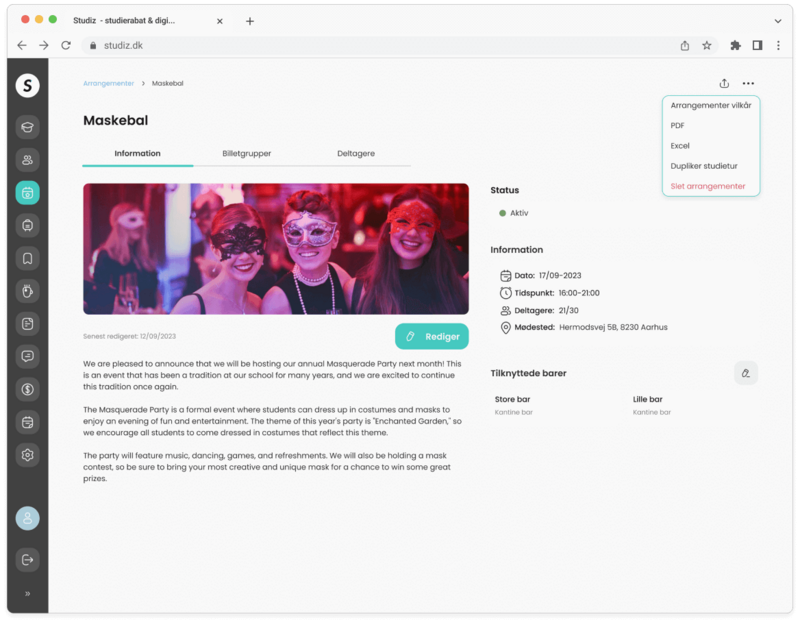
When you click on the event, you will be navigated to its’ detailed page.
On the information tab you can:
• Read more about the event and edit its’ information
• Change the status of the event - when it’s active, every student who is eligible to attend can see the event
• Assign bars that will be open during the event
• Export as PDF/Excel
• Duplicate or delete the event
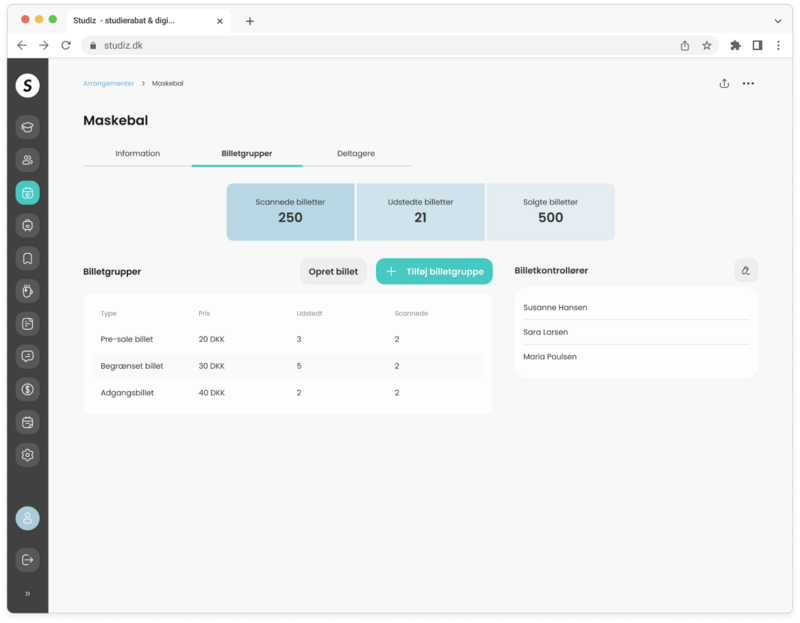
On the ticket group tab you can:
• See all ticket group information and edit/add new ones quickly
• See ticket sale and scan statistics
• Select who specifically should be allowed to scan tickets. By default, all teachers and all students from the assigned party committee can scan. It is also possible to add external ticket scanners
• Issue a “free” ticket
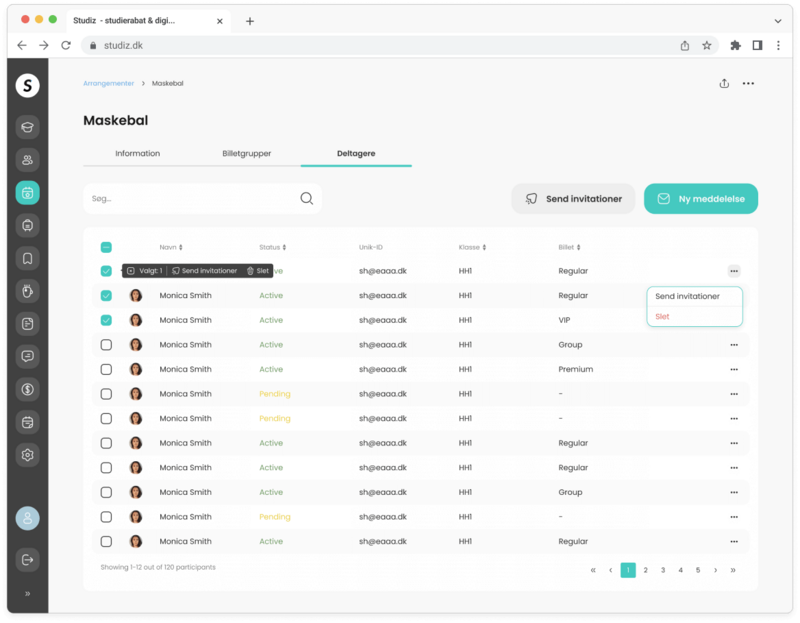
On the participant tab you can:
• See an overview of all students who purchased a ticket for the event
• Send invitations or write a messages to all participants
• View individual tickets and QR codes
• Cancel ticket reservations
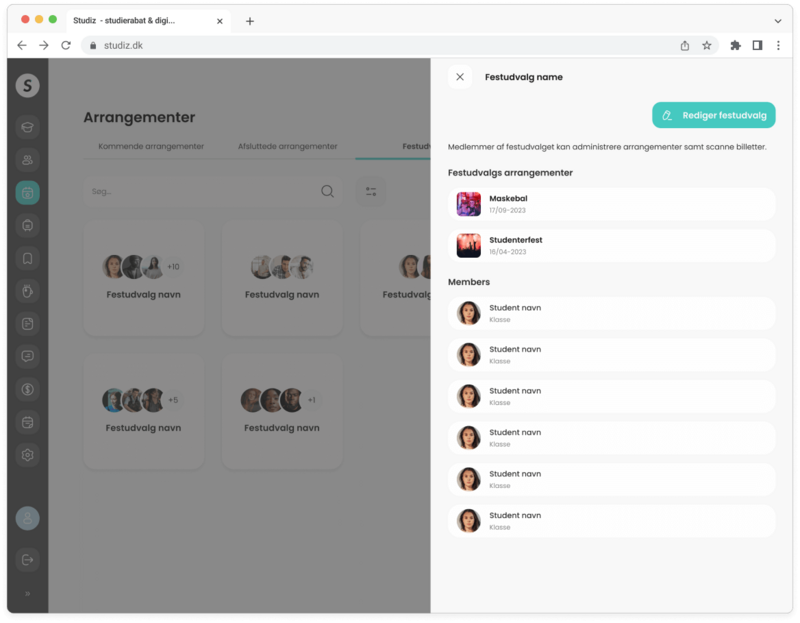
5. Party committees
You can create as many party committees as you wish. The purpose of it is to allow students to administrate events and scan tickets.
When you create a party committee, you should:
• Fill in the name of the party committee
• Select party committee members from the student list
• Specify access rights that the members will have
• Specify events that party committee will be able to administer
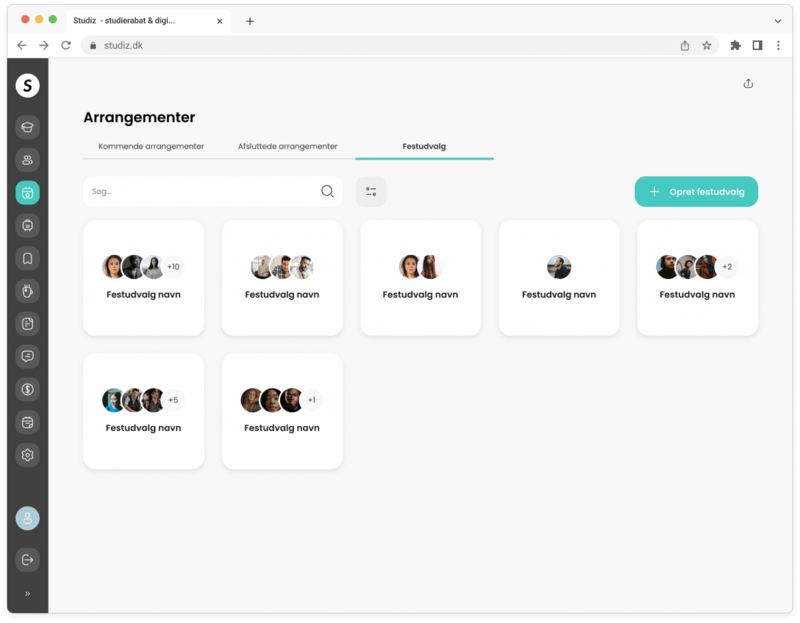
On the party committee tab, you can:
• See all the existent party committees and be able to edit/delete them
• See detailed information about each party committee, its members and assigned events
6. What can students see?
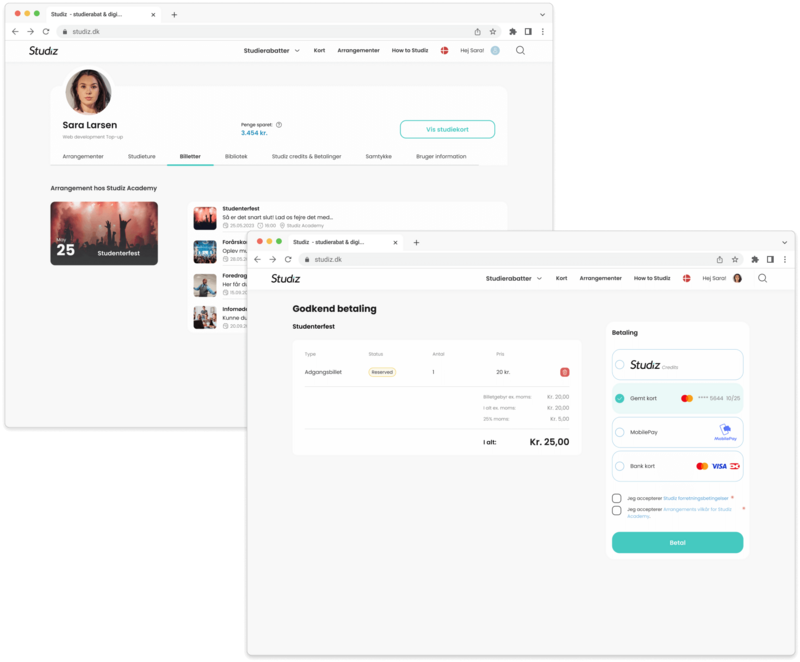
When an event is active, students that have a verified Studiz profile and/or have received an invitation to the event, can view it via their student profile on the event side at studiz.dk. In addition, link to the event can be found in the invitation e-mail.
• Students can see and read all the information regarding the event
• Student can purchase the event ticket by adding it to the basket and selecting a payment method
• Students can also send the payment link, e.g. allowing a family member to pay for the ticket