This guide explains how to configure Single Sign-On (SSO) for Studiz institutions using Microsoft Entra ID with the SAML2 protocol.
Important Prerequisites: Make sure that your user has Global Administrator rights on your Microsoft Entra ID tenant.
Please follow the steps below:
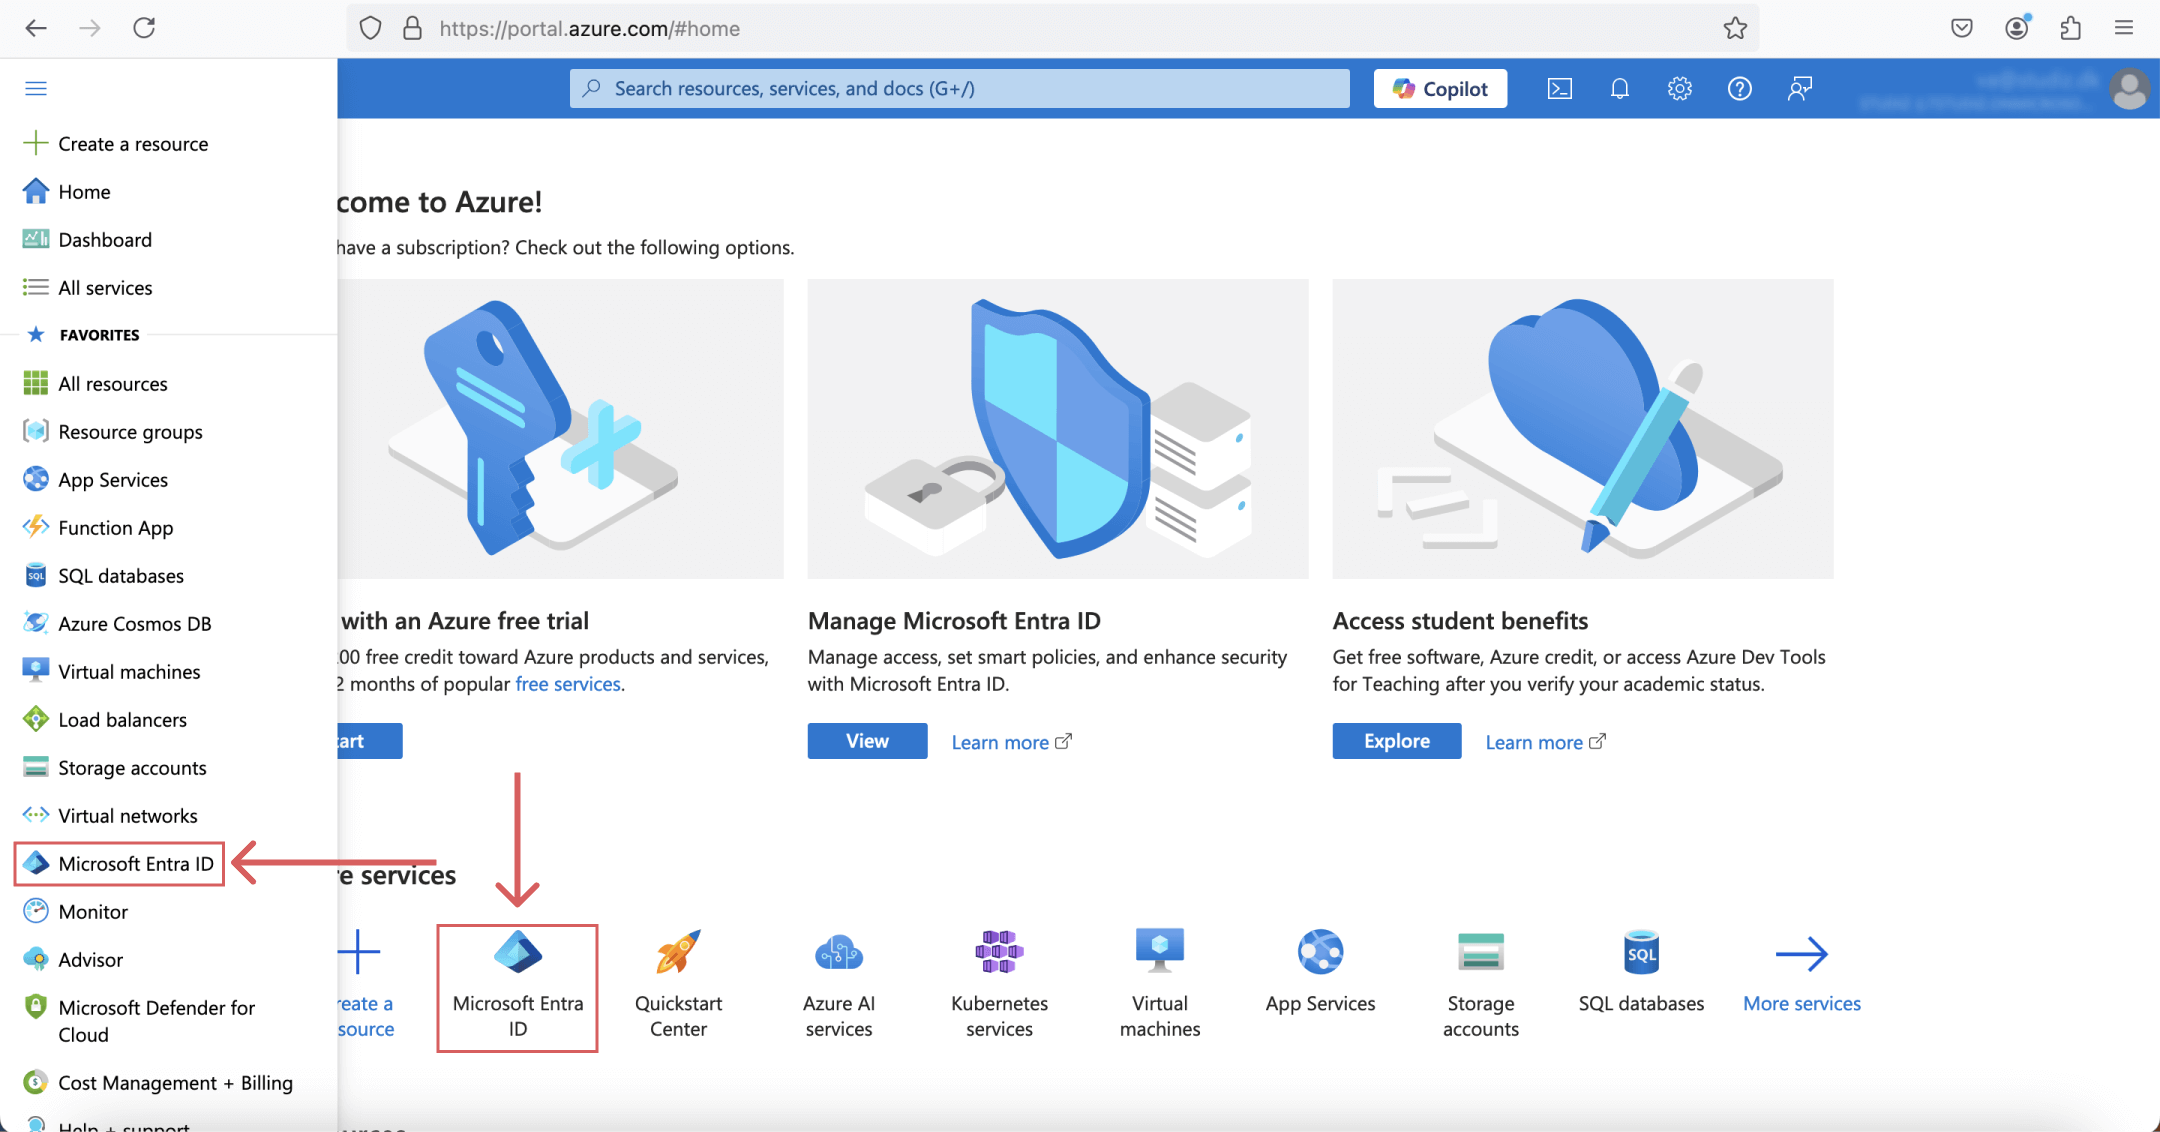
1. Access Microsoft Entra Portal and log into your Microsoft account - press here to navigate.
2. From the main dashboard, navigate to Microsoft Entra ID:
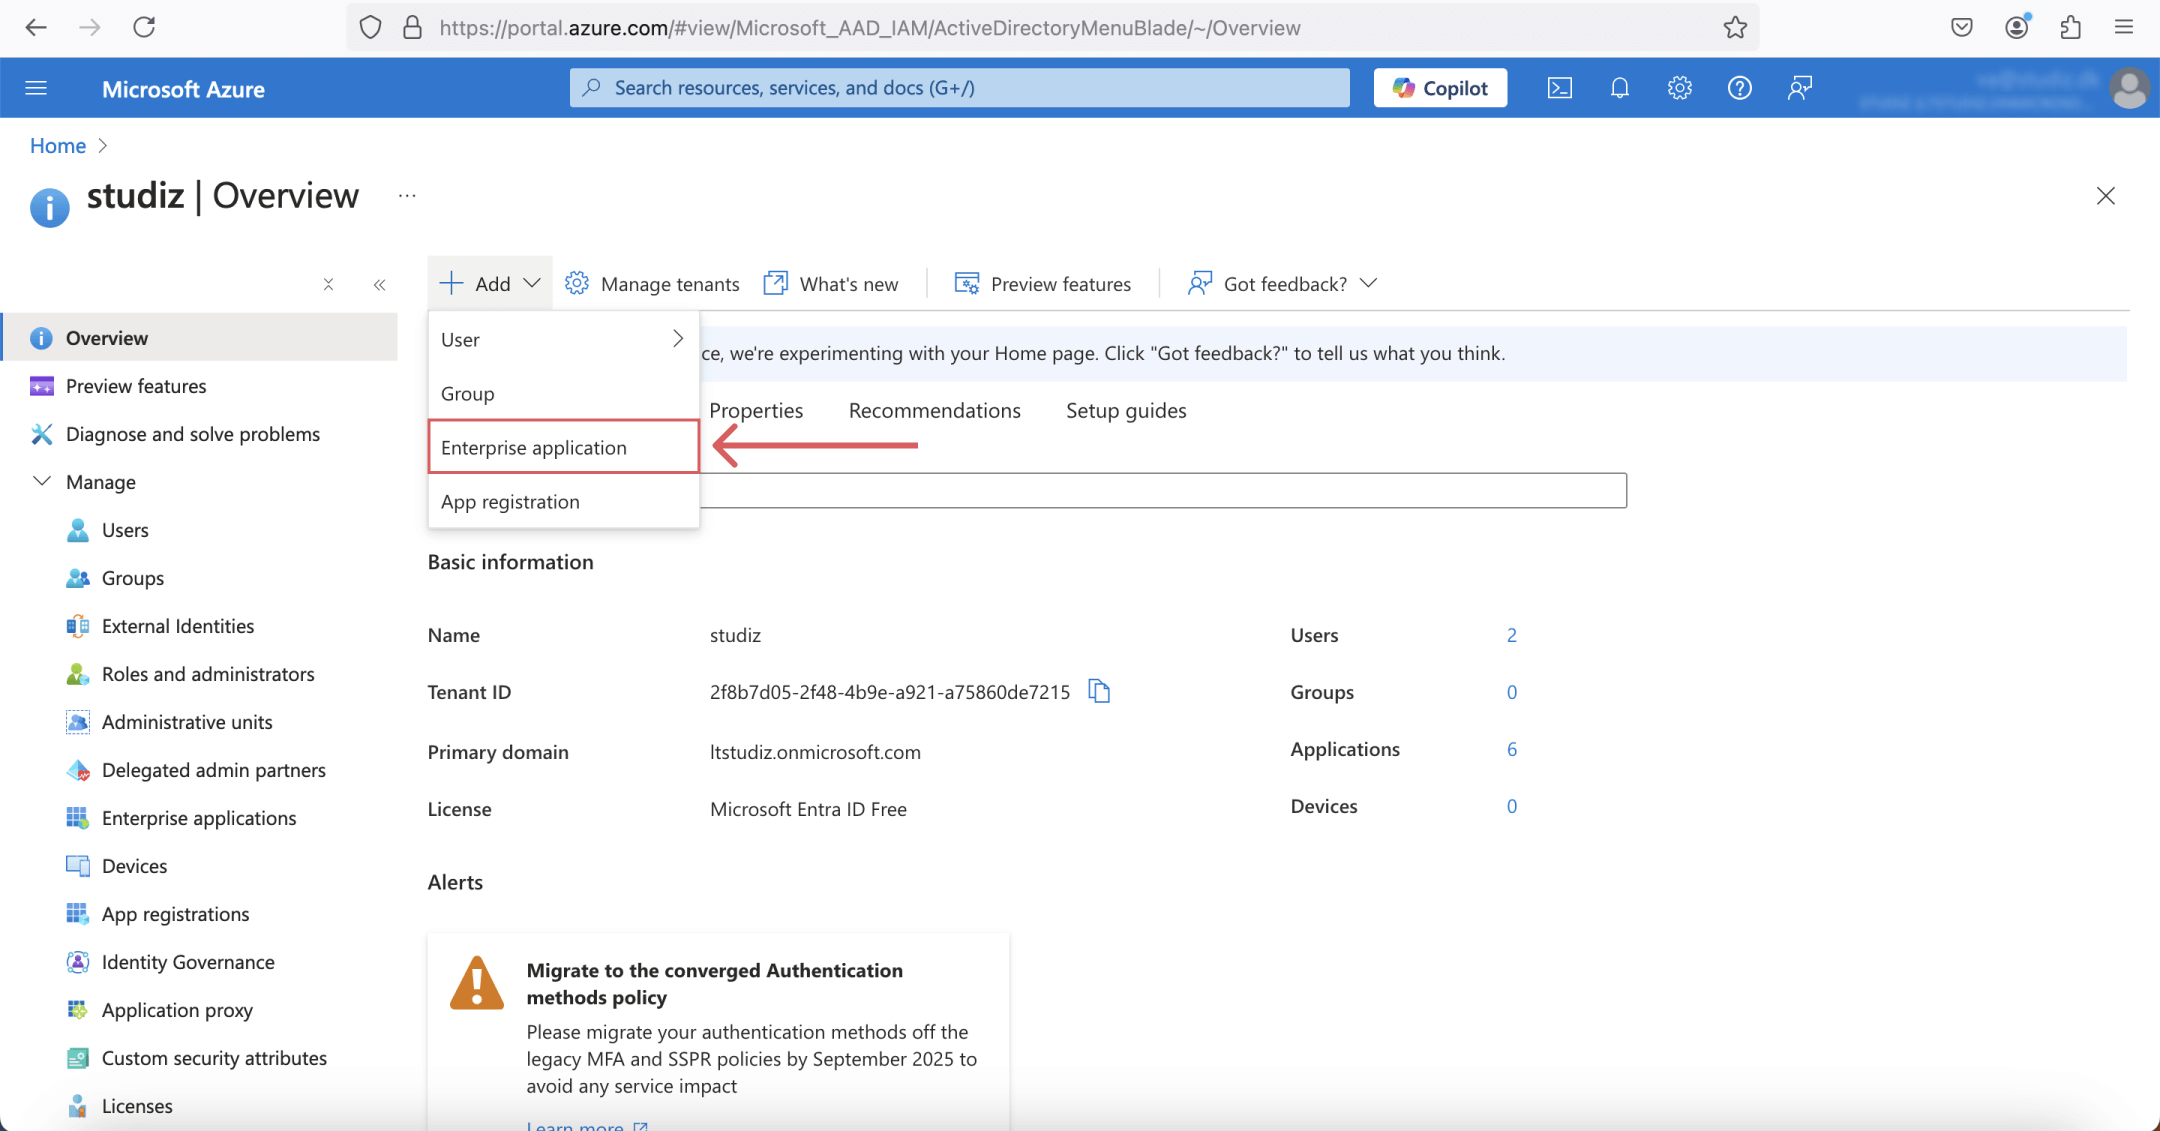
3. Next, click on the "Add" button with the plus icon and select "Enterprise application" from the dropdown:
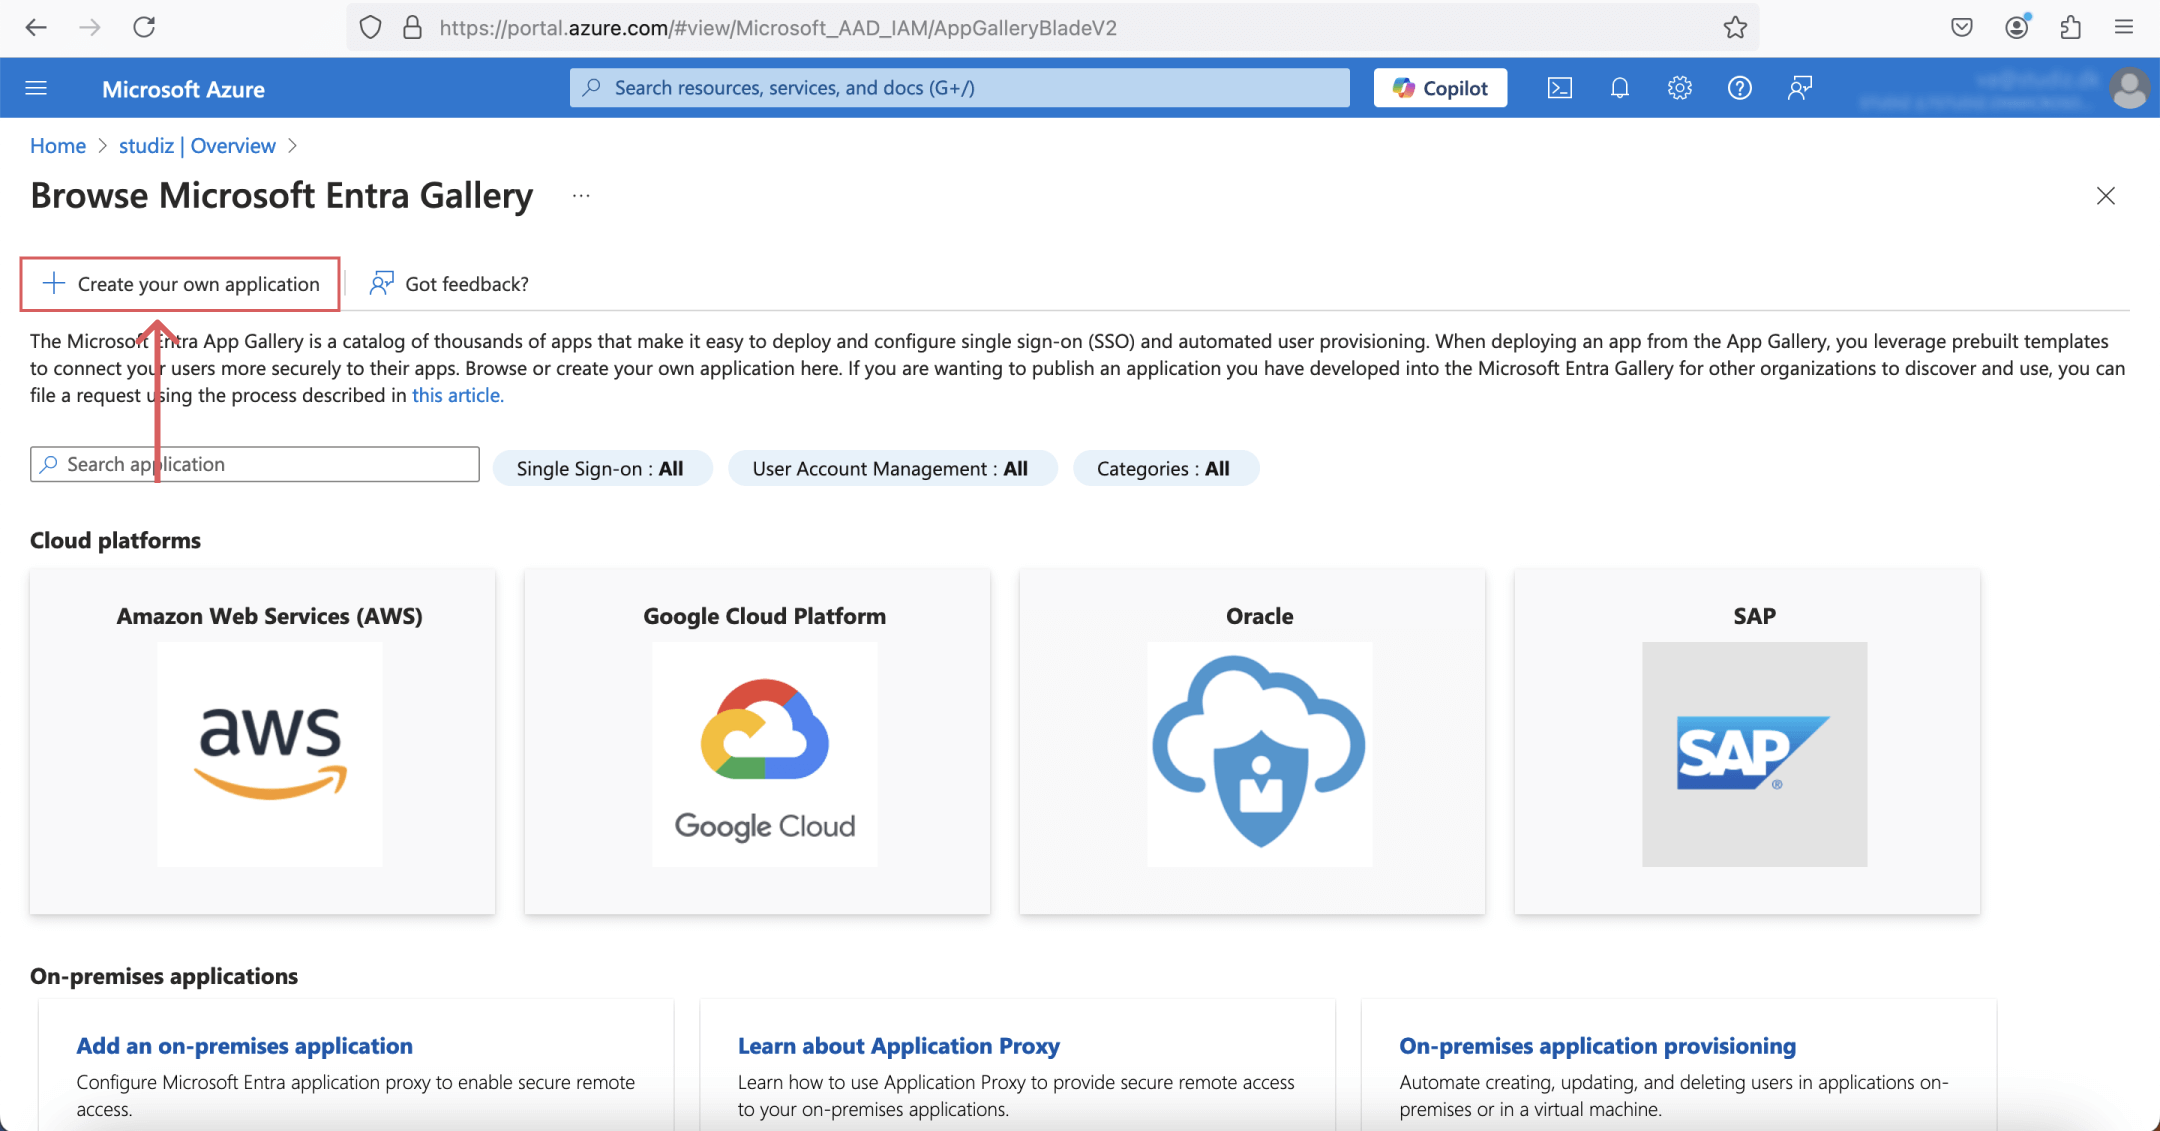
4. In the gallery, click on the "Create your own application" button with the plus icon:
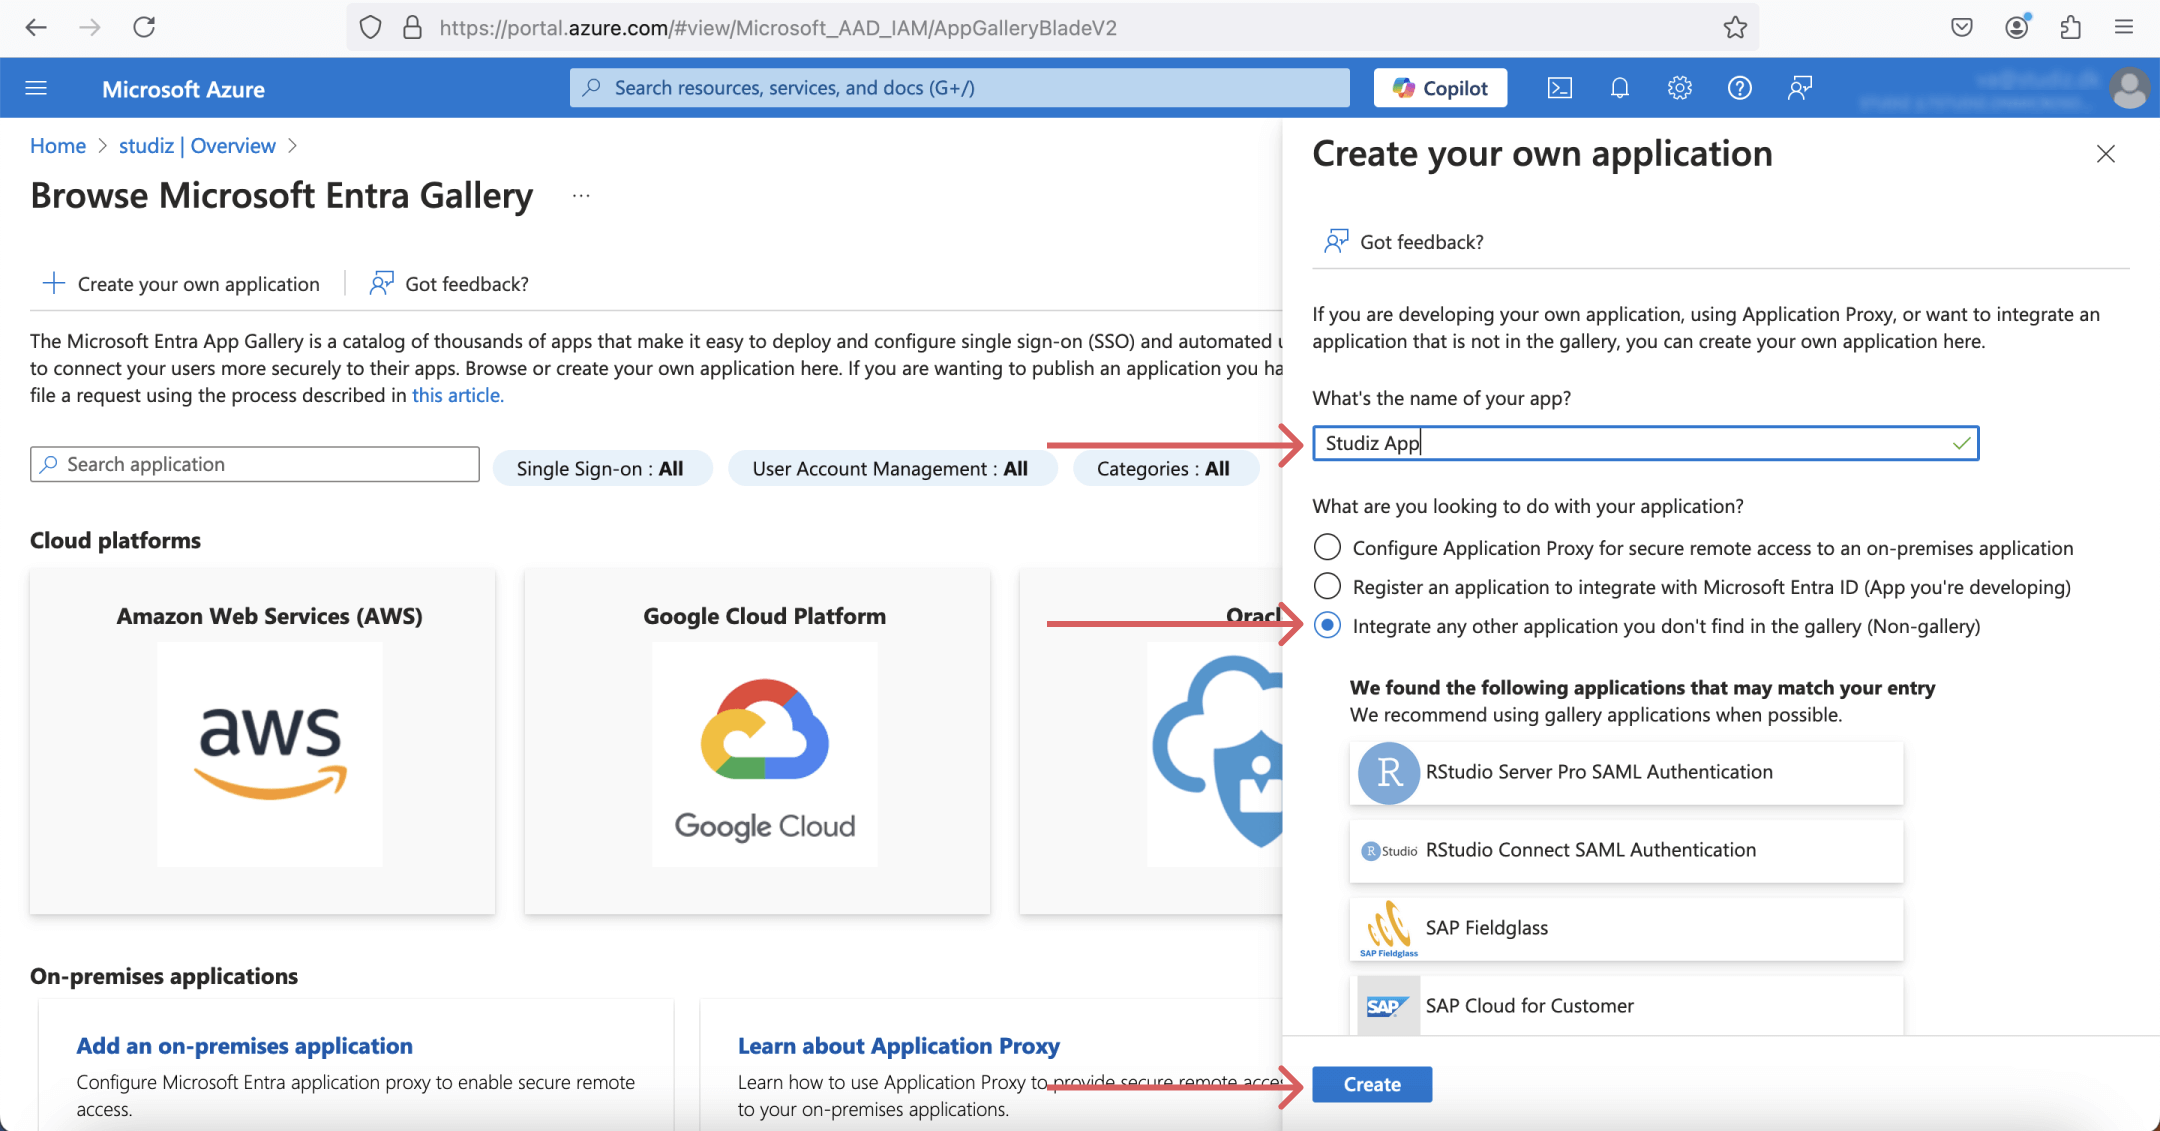
5. In the panel that appears:
• Type in an application name (e.g., "Studiz").
• Select the last radio option: Integrate any other application you don’t find in the gallery.
• Click "Create" button:
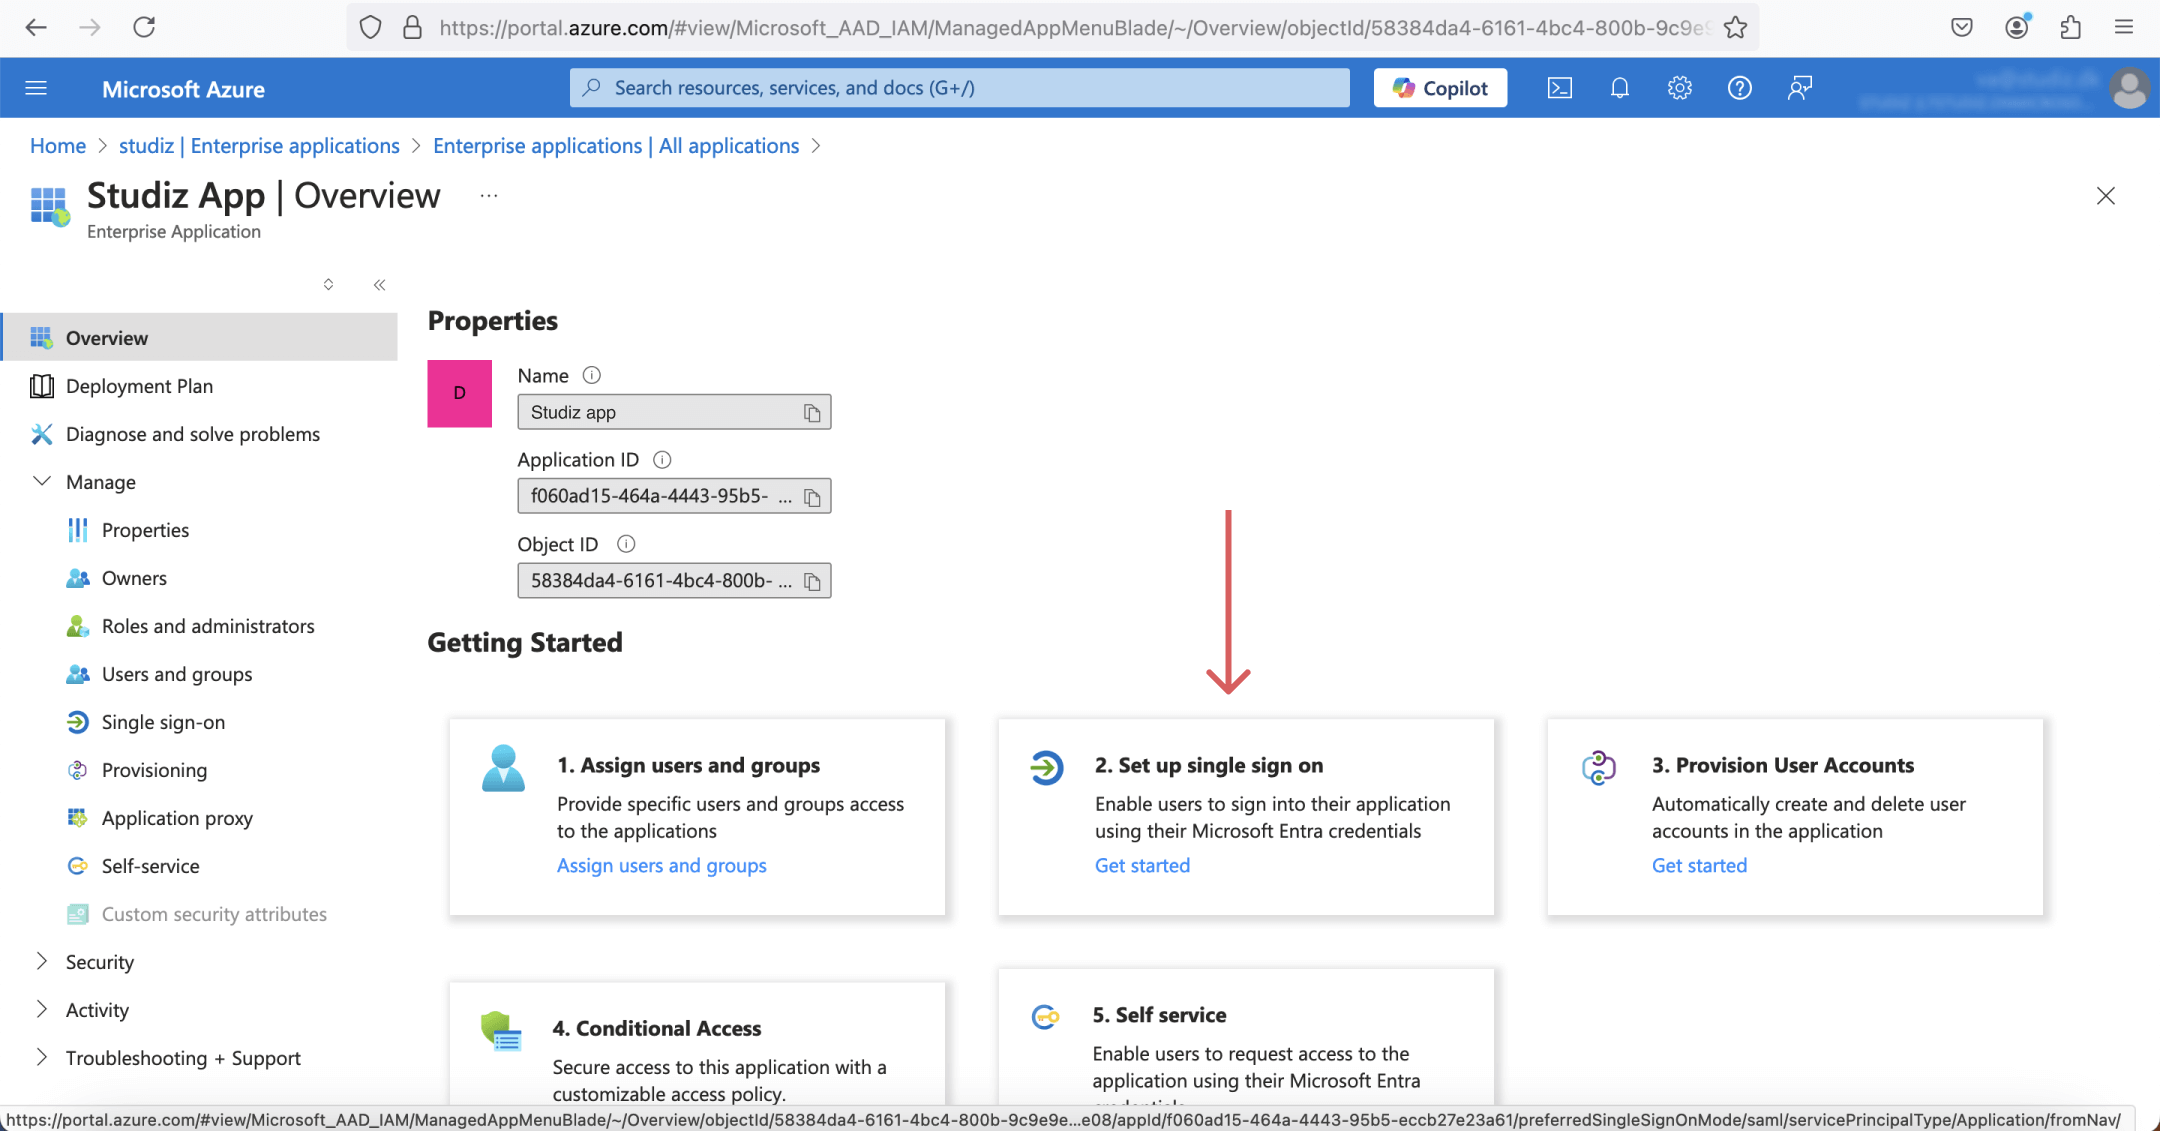
6. After your new application is created, you need to set up Single sign-on by clicking on this box in "Getting started" section:
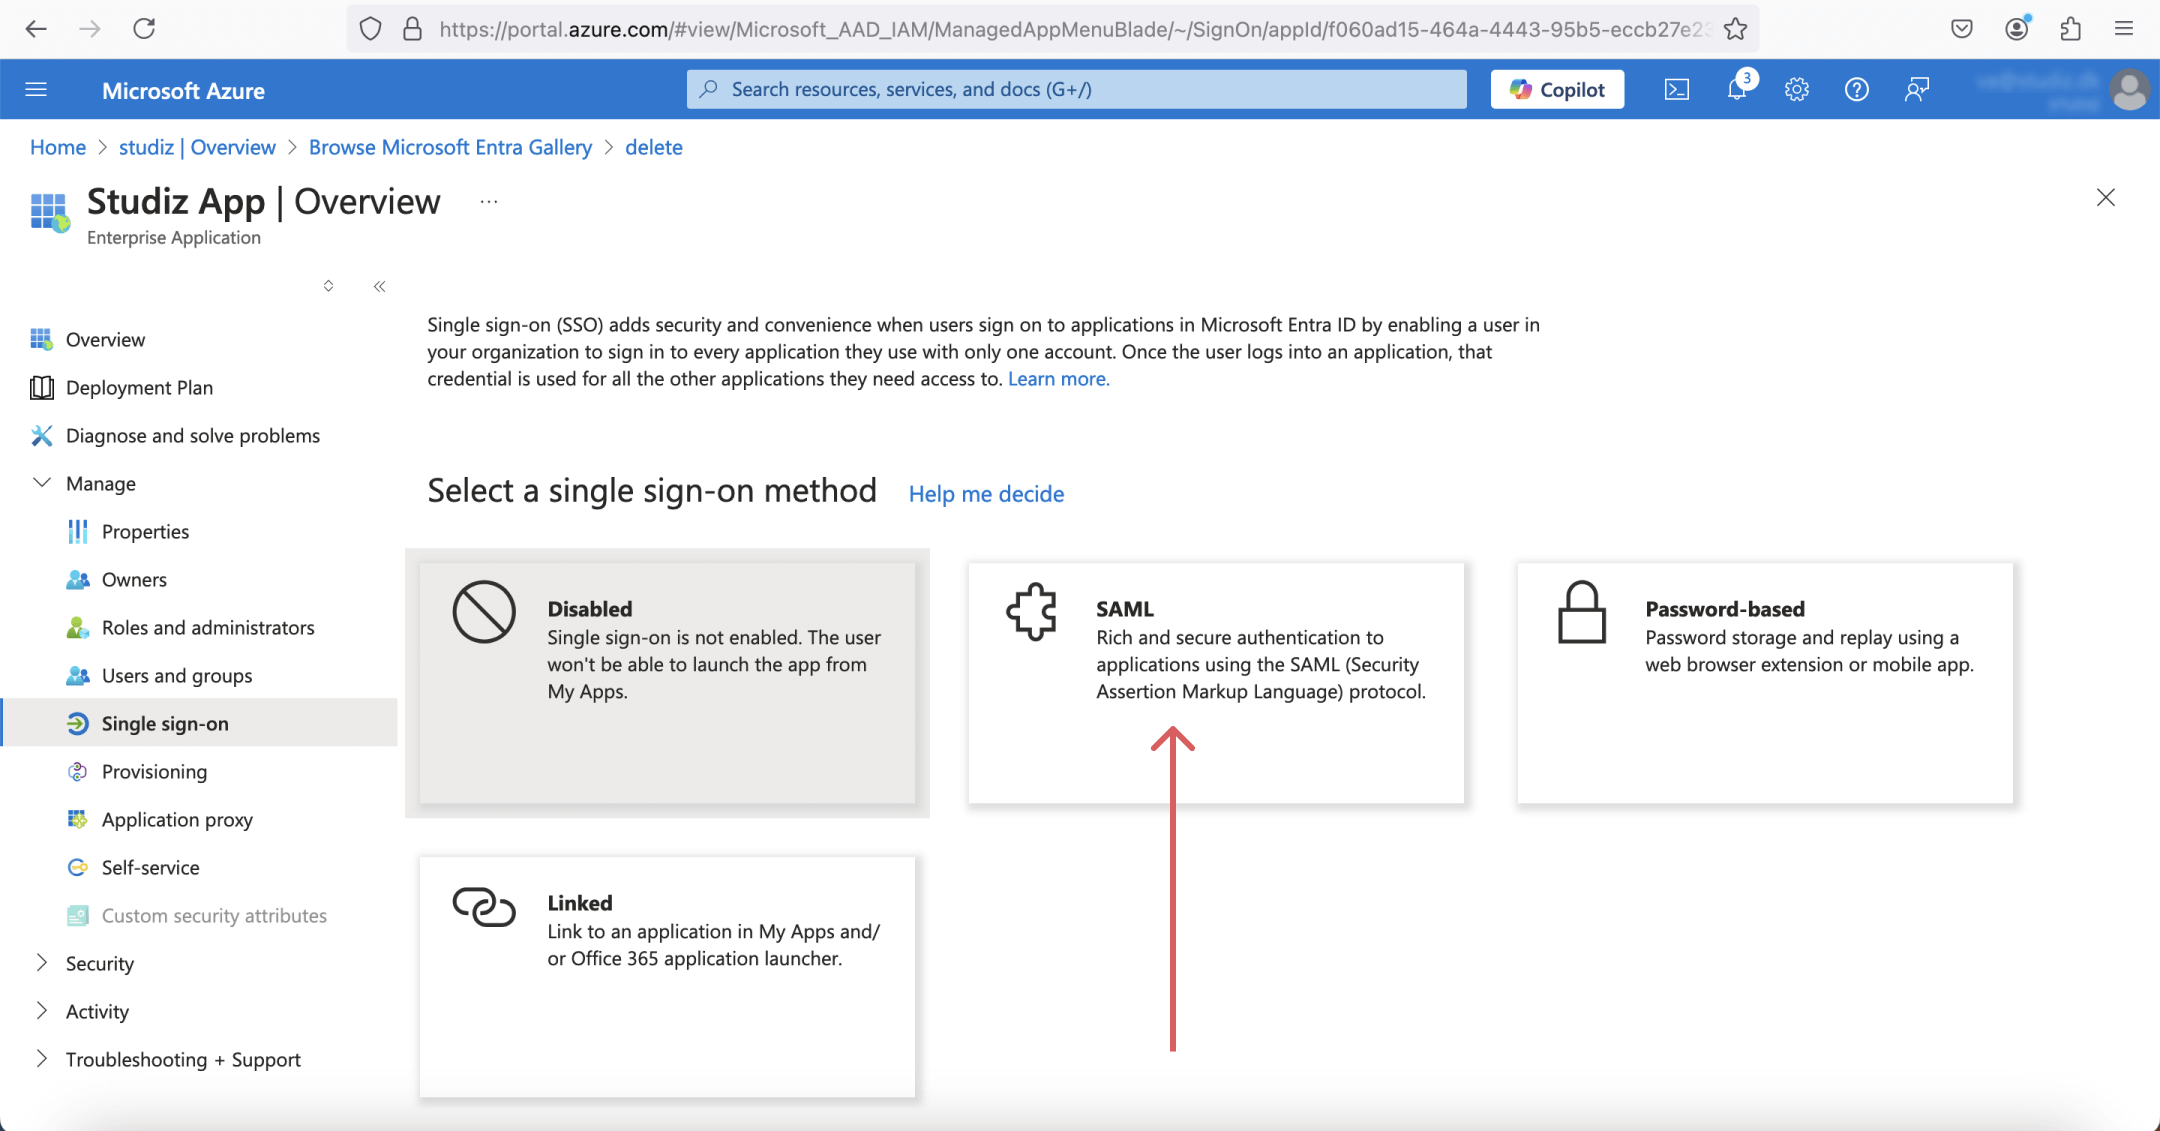
7. On the next page, select SAML as your Single sign-on method:
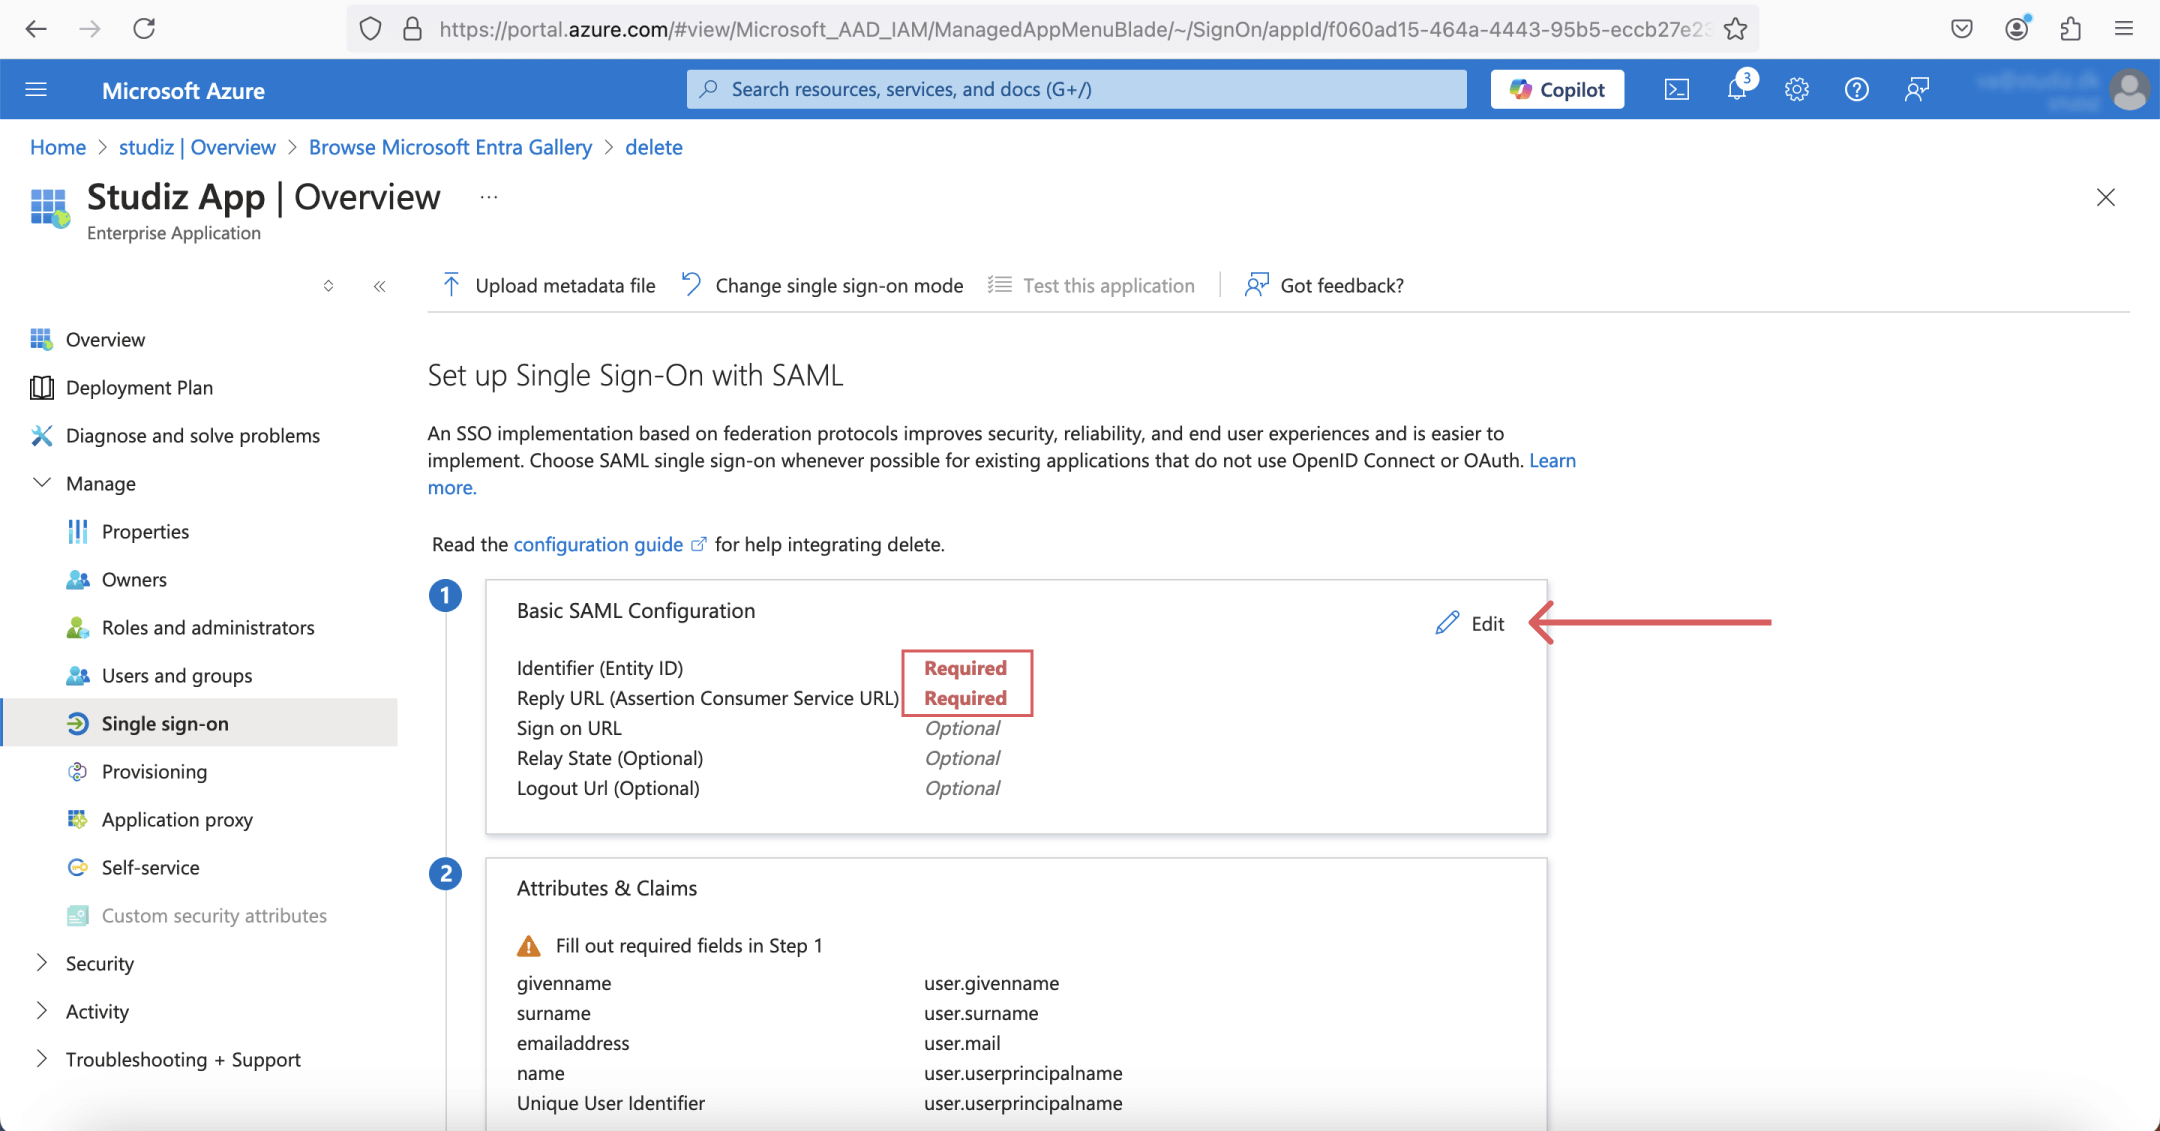
8. To finish the Basic SAML Configuration, it is required to enter Identifier and Reply URL values. Press on the "Edit" button to do that:
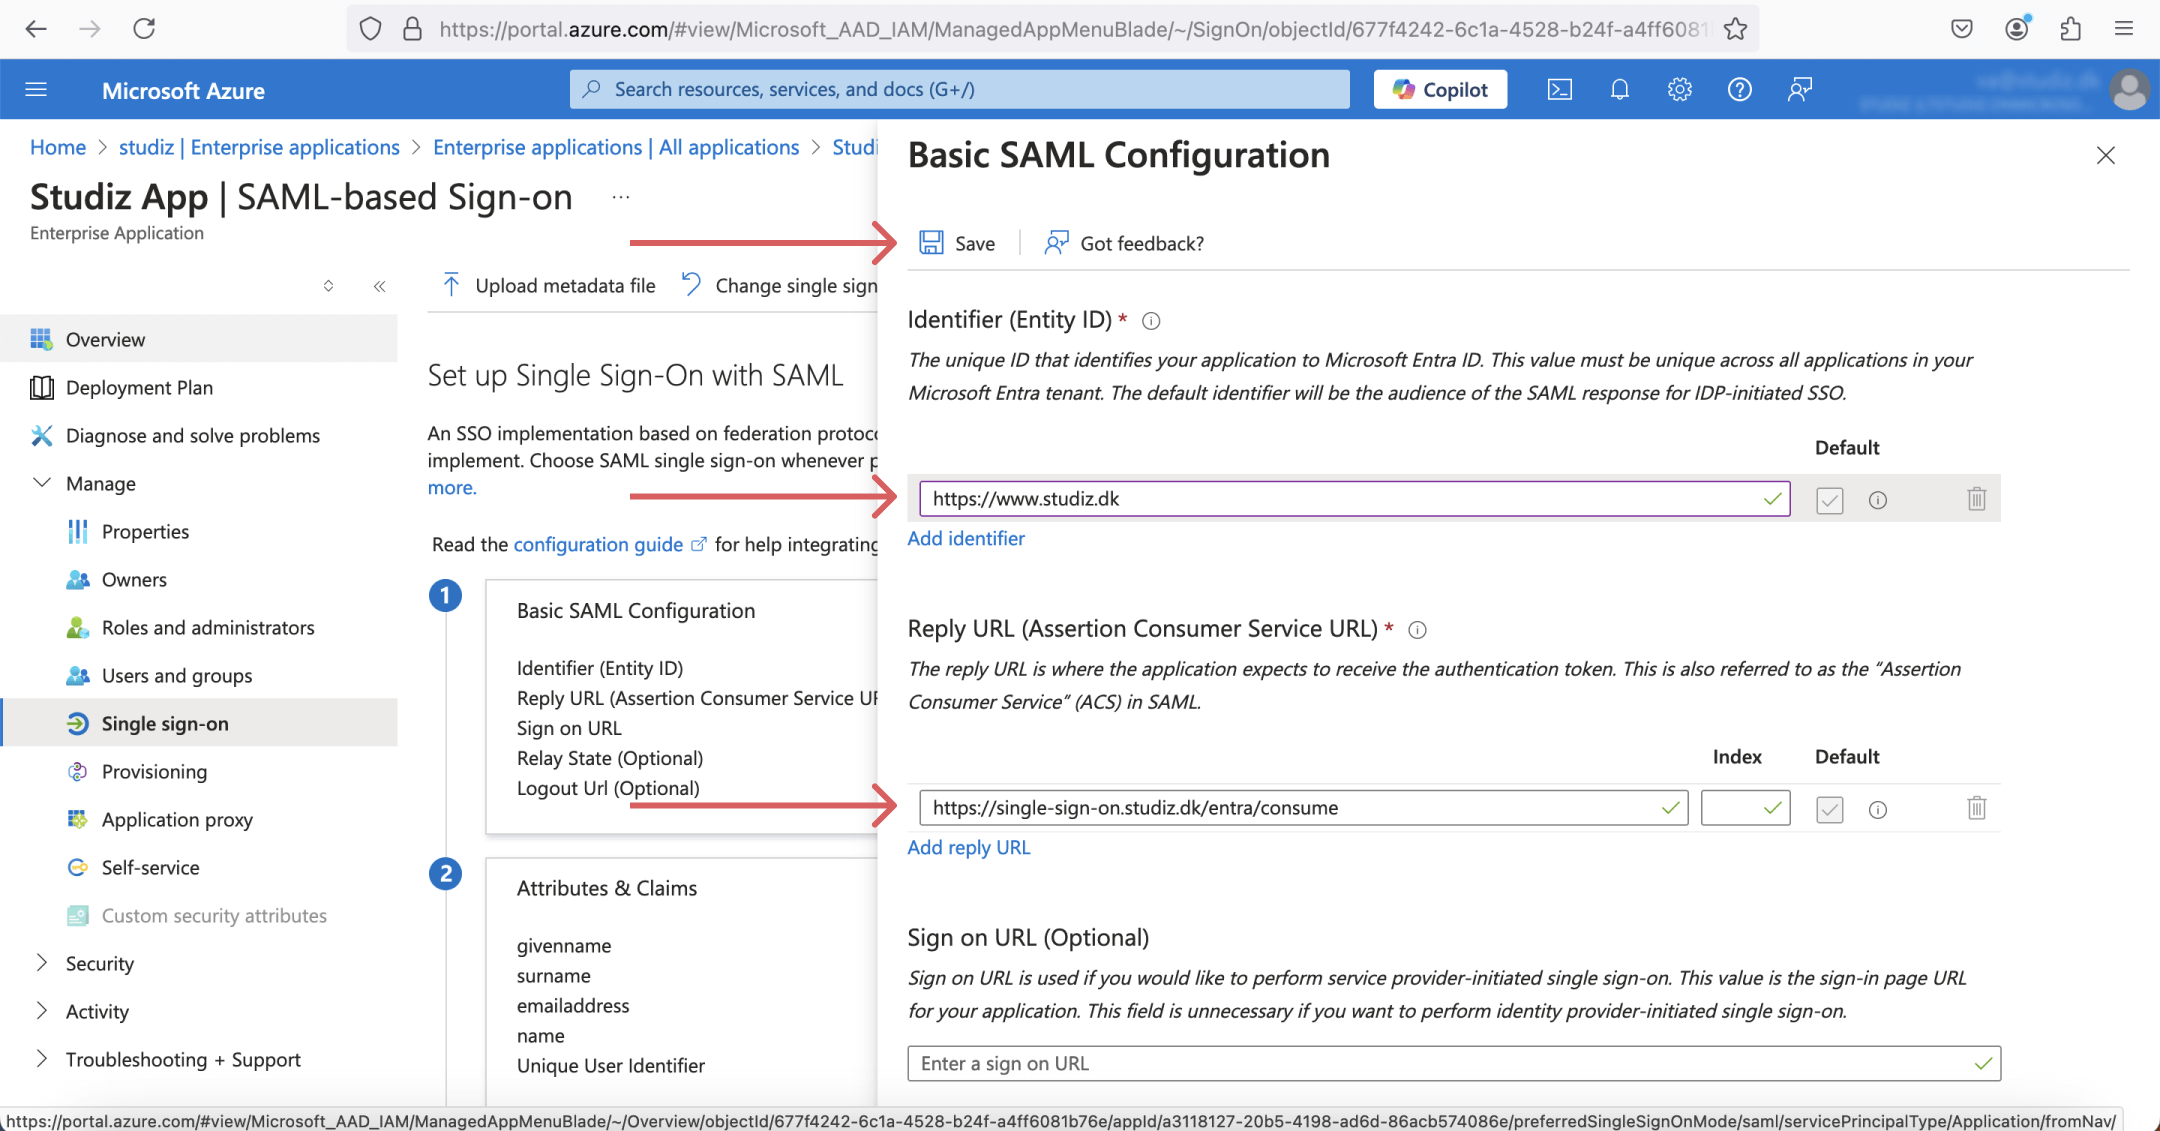
9. In the panel that appears, add following values:
• Identifier (Entity ID): https://www.studiz.dk/
• Reply URL (Assertion Consumer Service URL): https://single-sign-on.studiz.dk/entra/consume
• Click "Save" button.
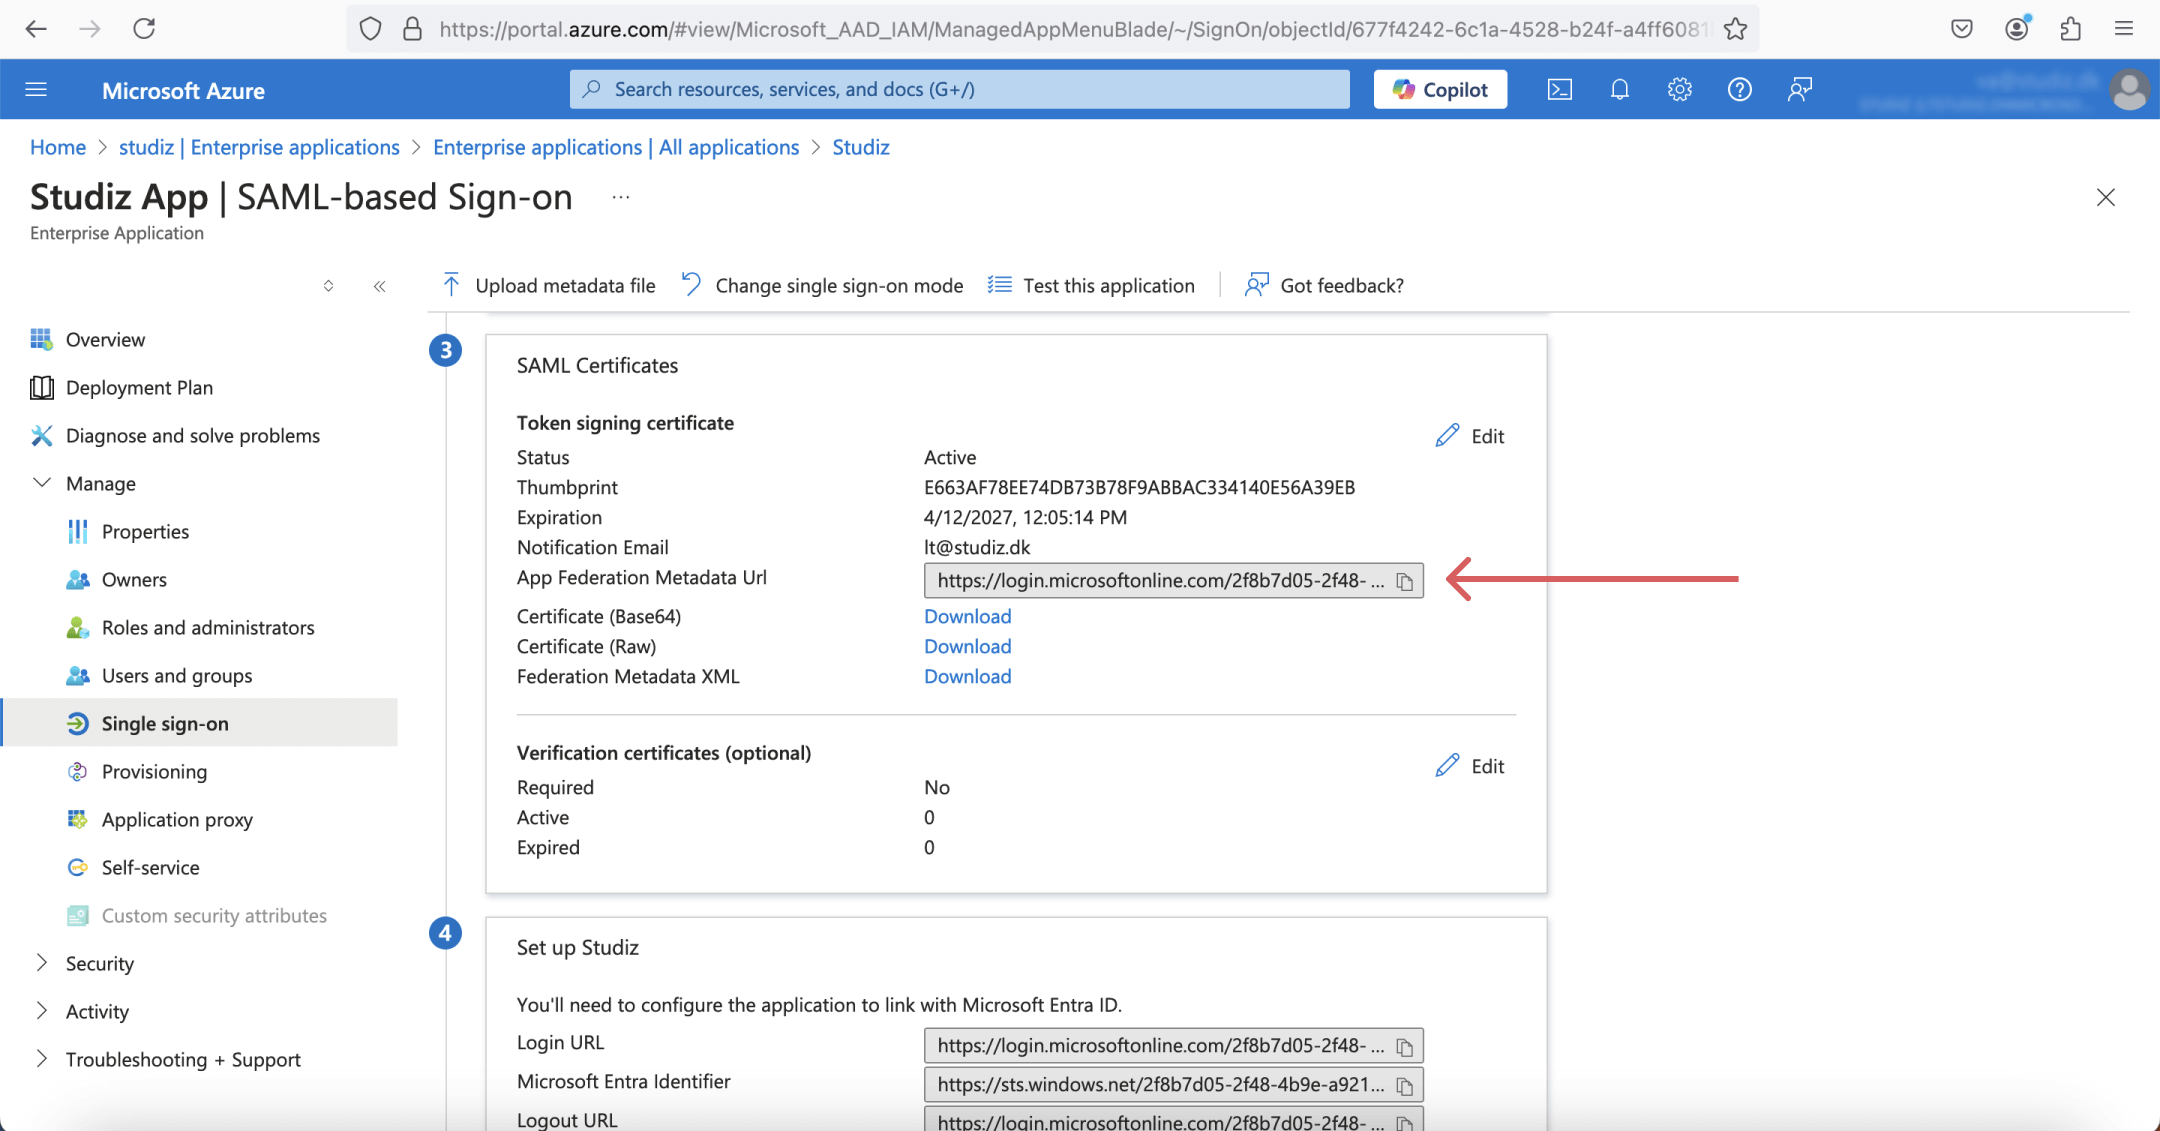
10. Now that the setup is completed, please copy the App Federation Metadata Url data and send it to Studiz e-mail so we can finalize the SSO setup on our side.
Congratulations! You have successfully completed the SSO configuration for Studiz.
If you encounter any issues, contact Studiz support for assistance.
